How to Prepare Your Interior Walls for Painting: The Right Way
Ask any professional painter what separates a job that looks great in photos from one that holds up for a decade, and they’ll tell you the same thing: preparation. The paint itself matters far less than what happens to the surface before you open the can.
Whether you’re tackling a room yourself or want to understand what a professional crew should be doing, here’s the proper preparation sequence for interior walls.
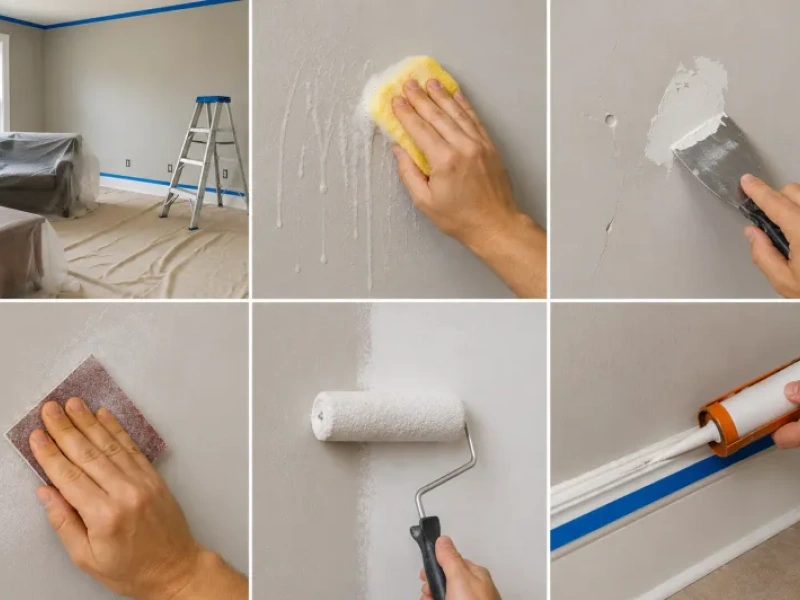
Step 1: Clear and Protect the Space
Move furniture away from walls and cover anything you can’t move with drop cloths. Remove outlet covers, switch plates, curtain rods, and hardware; painting around them leads to sloppy edges and missed coverage behind faceplate edges. Use painter’s tape to mask baseboards, crown molding, and ceiling lines if you’re not floating them freehand.
Step 2: Clean the Walls
Grease, dust, and grime prevent paint from bonding properly. Wipe down walls with a TSP substitute or sugar soap solution, paying special attention to areas around light switches, doors, and in kitchens. Let the surface dry completely; painting over damp walls traps moisture.
Step 3: Fill and Patch
Every nail hole, crack, dent, and gouge gets filled. For nail holes, lightweight spackling works well. For larger cracks or holes, use joint compound and allow multiple thin coats to dry rather than one thick coat (thick compound shrinks and cracks as it dries). Sand each repair flush once dry.
Step 4: Sand the Surface
Even if the walls look smooth to the eye, a light sanding with 120-grit sandpaper removes sheen from existing paint and gives the new coat something to grip. This step is non-negotiable on high-gloss surfaces. After sanding, wipe the walls with a damp cloth or vacuum the dust off; painting over sanding dust creates a gritty finish.
Step 5: Prime Where It Matters
Primer isn’t always necessary for an interior repaint in the same color family, but it’s essential when:
- Going from a dark color to a light one
- Painting over new drywall
- Covering patches and repairs
- Working on a surface that had water damage or staining
- Using a flat paint over a previously glossy surface
Step 6: Caulk the Gaps
Fresh caulk along the joint between the wall and trim creates a clean, professional line and prevents paint from cracking in expansion gaps. Use a paintable latex caulk and smooth it with a damp finger before it skins over.
Why This Matters
Skipping prep steps saves an hour on day one but costs years off the paint job’s life. The homes we repaint where the previous contractor cut corners show it clearly: peeling at the edges, failing patches, and paint that never properly bonded. Done right, an interior paint job should look great for 7–10 years.
Want it done right the first time? Contact WG Construction for a free interior painting estimate.